The pull-up is one of the biggest milestones when it comes to upper body strength. Here are easy-to-follow moves to not only get your chin over the bar, but also strengthen your core, chest, and shoulders.
Pull-ups help correct an increasingly prevalent postural issue—upper crossed syndrome. Shoulders that round forward and “text neck” are telltale signs of UCS. Look around you. Most people have rounded shoulders and a head that drifts forward.
We practically live our lives with our arms forward and head down—looking at phones, on the computer, and even driving the car. Our chest and shoulder muscles get tighter, underworked back muscles develop dysfunction, and our posture suffers.
Science—and even common sense—will tell you that poor posture is a problem that can have lasting consequences (1).
Looking for an easy way to get started working out? Grab our FREE Beginners Workout Guide – 3 Weeks To Tighter Abs, Sculpted Arms, And Toned Legs, by clicking here!
Luckily, the right exercises can help correct, or even prevent, an inevitably painful posture. The key to correcting upper crossed syndrome is simple—strengthen your back. Incorporating more pulling into your workout routine will help you do exactly that, and pull-ups are a perfect fit.
How To Master The Pull-Up
To truly master the pull-up, you need complete upper body strength and stability. That means more than a strong back. Your grip, your entire shoulder girdle, and even your core need to be fit for the task.
In short, you need to do more than merely practice your pull-ups.
Because it’s a compound movement (an exercise that requires flexion in two or more joints), pull-ups activate multiple muscles and muscle groups. Without balance between the working parts, the movement cannot be optimized.
Your core needs to be able to develop tension and create stability, while your front—chest and shoulders—needs to help maintain stability and a healthy shoulder position during the pull-up. On top of that, your back needs to be able to pull. It may seem like a lot, but don’t worry, we’ve got you covered with these key moves below.
Your Core
Wheel Outs
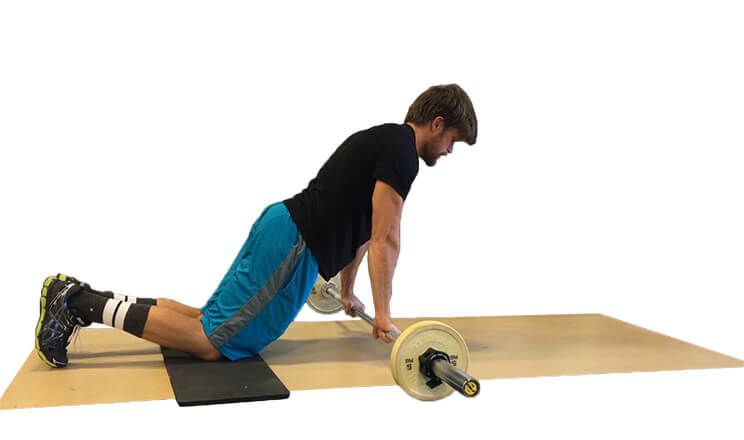
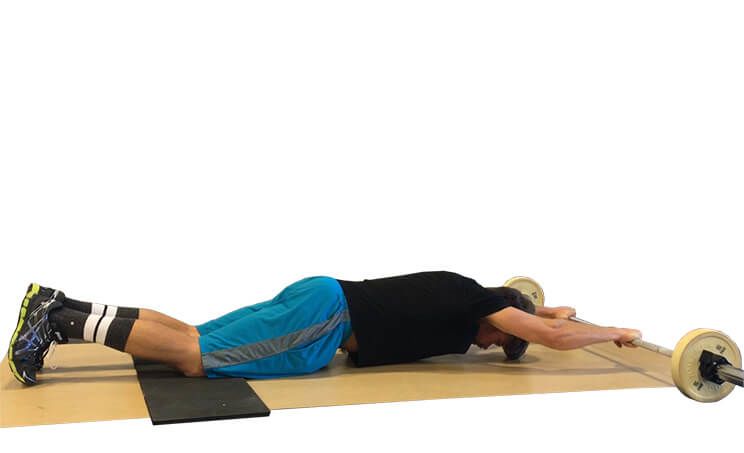
Ab wheels not only work the core, which helps with pull-up power, but they also mimic a lot of the key movements that you’ll use during a pull-up. Wheels are usually pretty easy to find. But it’s okay if you don’t have one. You can either use a barbell as a makeshift wheel or use your hands to walk instead of wheel out.
Regardless of what you use, your setup is key. And it’s all in the hips.
A common mistake when it comes to the ab wheel is hip flexion. Most people set up sitting back on their heels, but the hips should be forward and the glutes tight during the entire ab wheel. Think of a push-up position—you should have a straight line from your shoulders to your toes. It’s the same idea during an ab wheel, but the straight line is from your shoulders to your knees.
After setting up, keep your arms straight and use your core to maintain stability while you wheel—or walk your hands—forward. Ideally, you’ll get down to the point where your nose kisses the ground. Then reverse the movement, but don’t sit back. Roll. Keep the line from your shoulder to your knees straight the entire time.
Go only as low as you can with perfect form—flat back, straight arms, and tight glutes. As you get stronger, you’ll be able to go lower.
Your Front
Shoulder Taps
Upper body strength is critical when it comes to the pull-up. That’s no surprise. But it’s more than simply getting stronger at pulling. Overall body strength and stability will help you dominate your first pull-up. And that means both pushing and pulling.
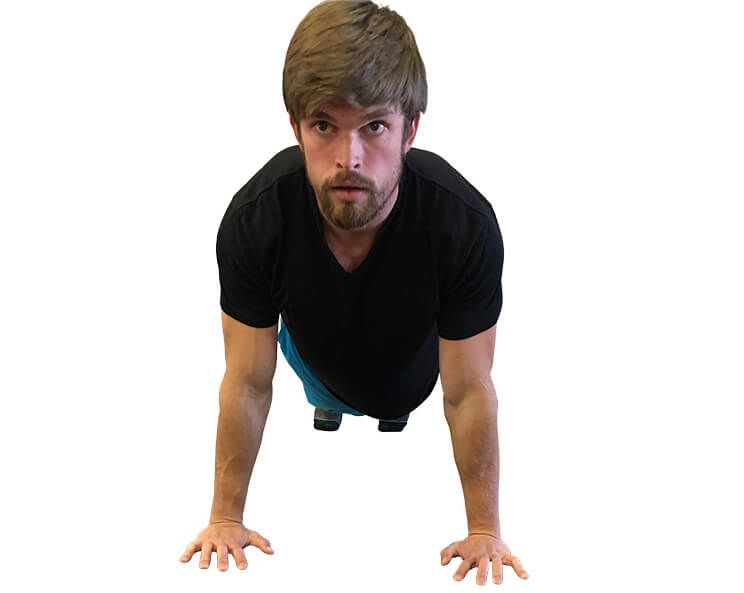
Even if you’re already a champ with push-ups, the shoulder tap is a good place to get started. Get set up in a push-up position—straight legs with a flat back. But instead of doing a push-up, slowly bring your hand across your body to tap your opposite shoulder. Then reverse the movement.
Be sure to go slowly and use your core to keep the body from rotating. The wider you have your feet, the easier shoulder taps will become. Select an appropriate width for your strength.
Push-ups
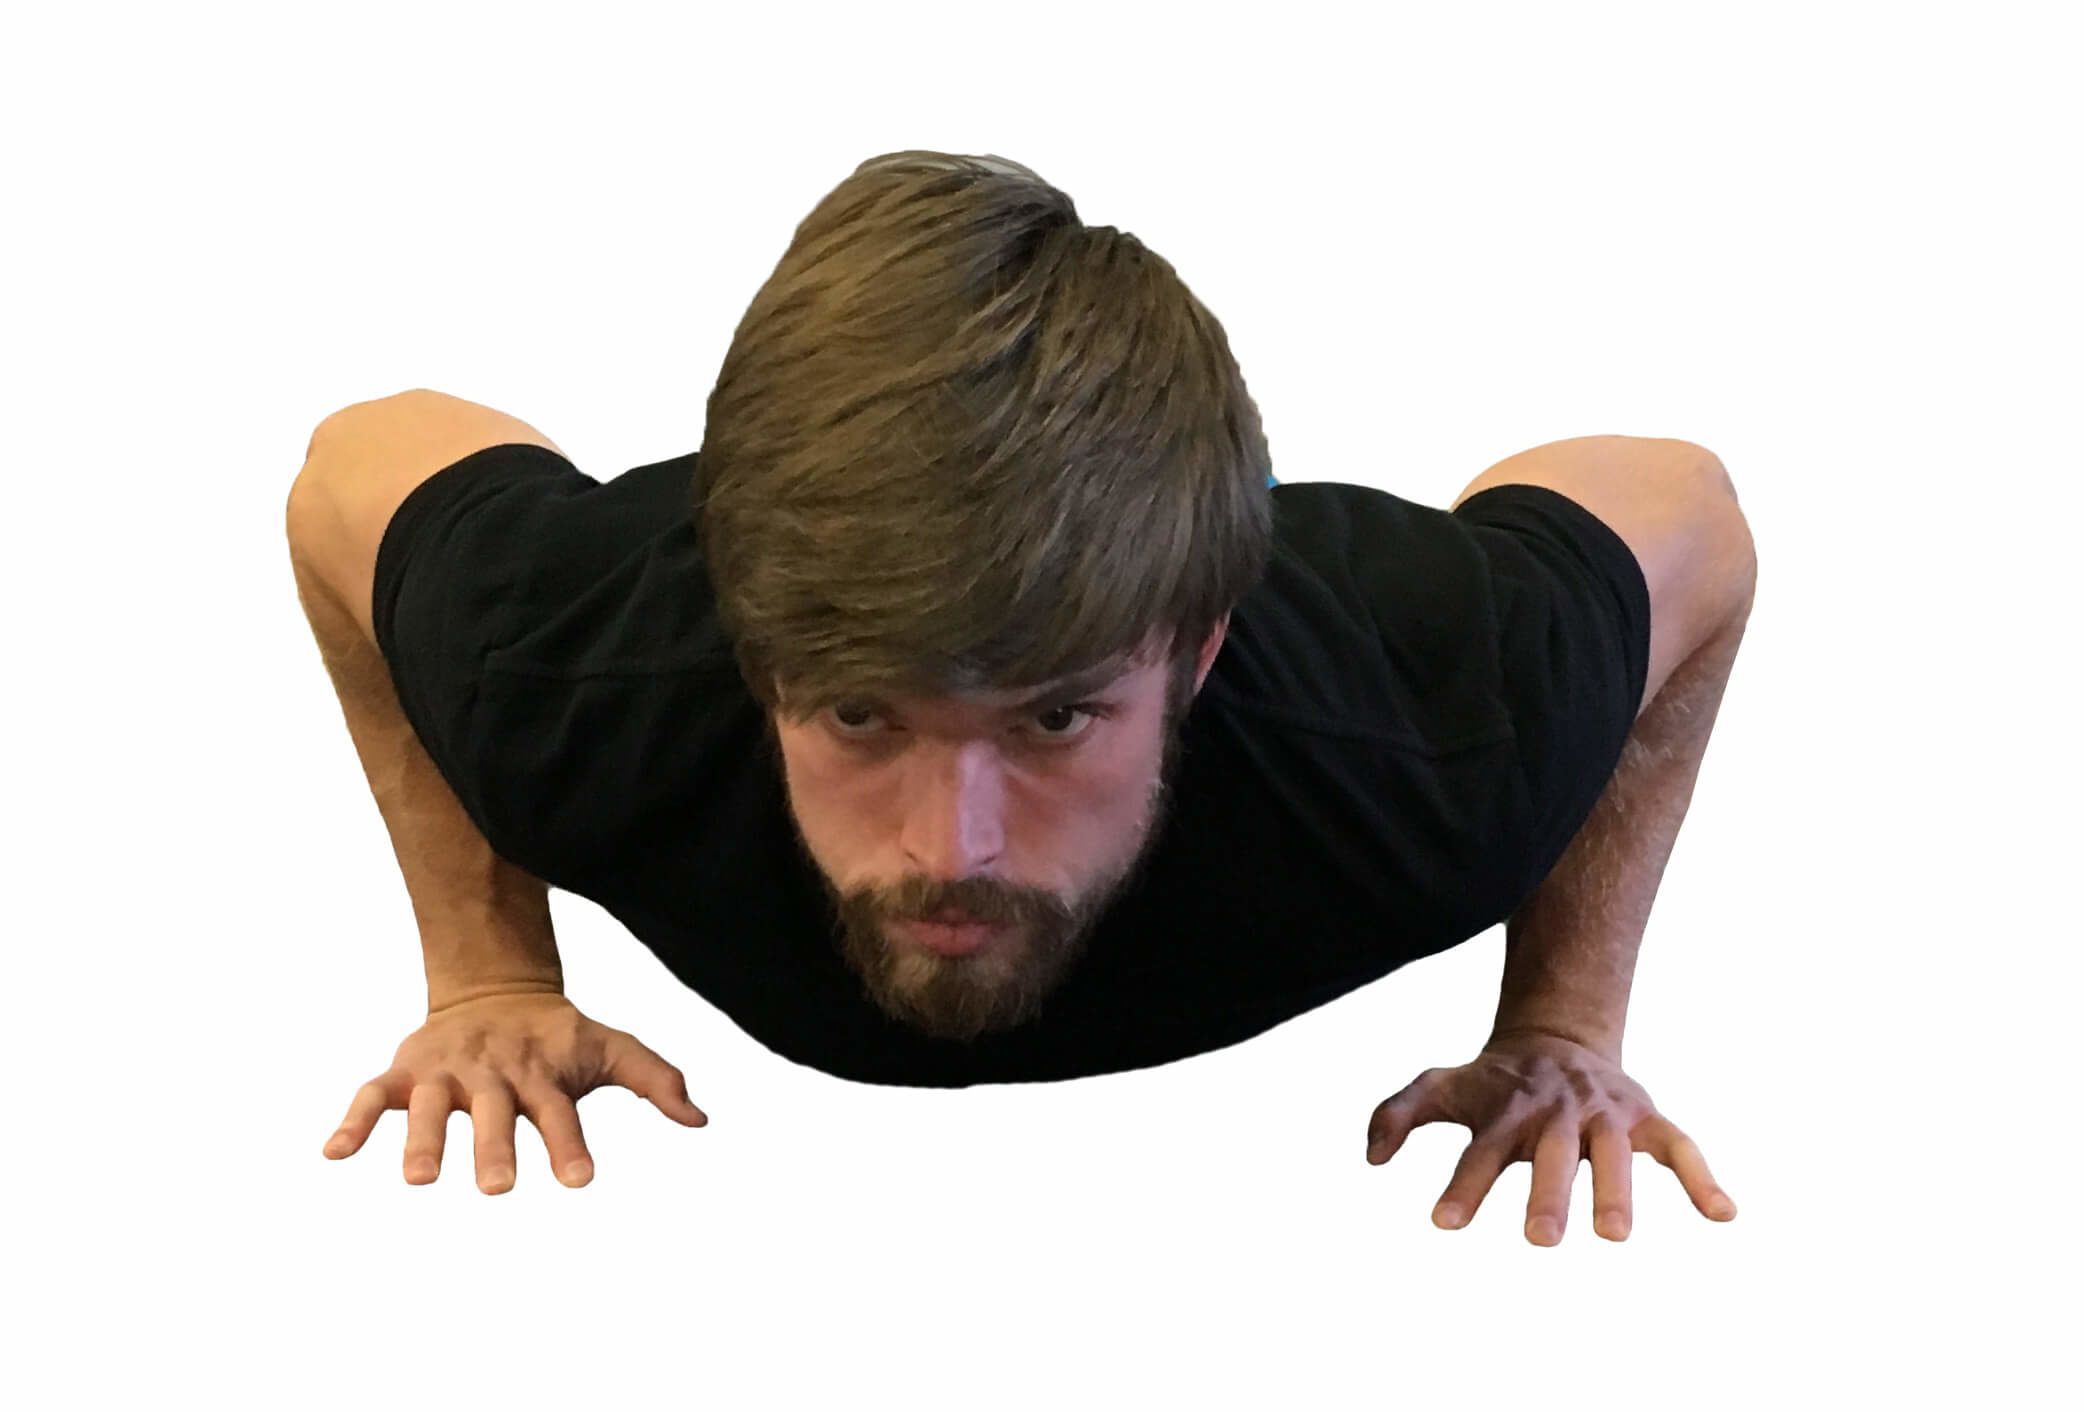
Most people are familiar with the push-up. There are a couple key points with push-up form to keep you injury-free. Make sure you keep a straight line from your shoulders down to your toes—this will help keep unnecessary strain off your lower back. Also, don’t flare your elbows outward; keep them close to your body (anywhere from 0–45 degrees should do). This will help keep you from putting your shoulders in an unstable position.
Your Back
Dead Hangs
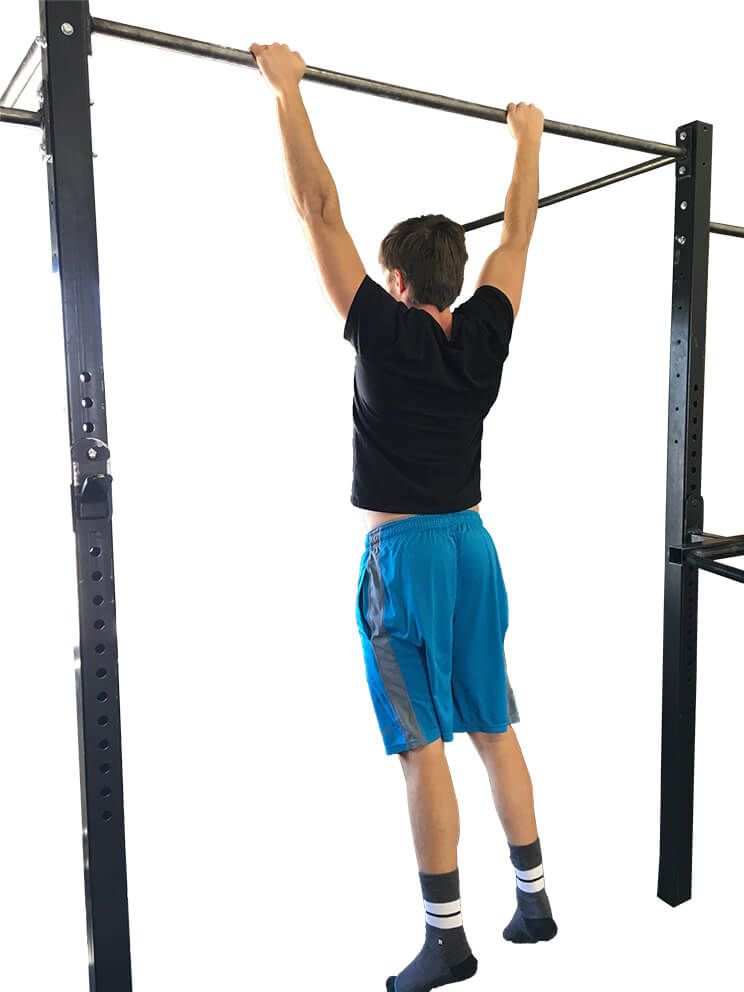
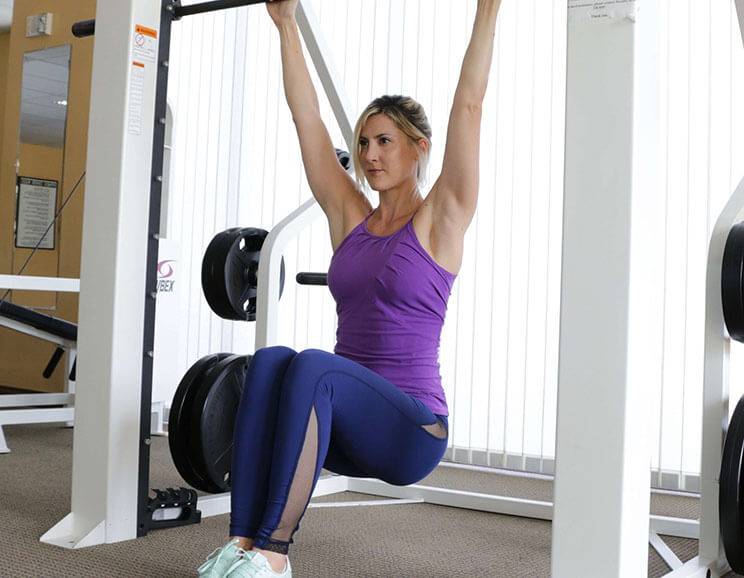
It’s about as simple as it gets. Grab onto the pull-up bar and hang. Here’s the key—maintain tension in your upper body, back, and core. It’s easy to dangle from a pull-up bar, but during a dead hang your shoulders should be packed and your core tight. This helps activate the muscles you’ll need for pull-up power.
Pull-ups—especially multiple reps—require a significant amount of time hanging from the bar. Until you can hang, pull-ups won’t happen.
Negatives
Similar to the dead hang, negatives take advantage of time on the bar. But they also take advantage of something called eccentric muscle contraction. During this particular type of contraction, muscles generate more force. Eccentric contractions happen during the controlled lengthening of a muscle under a load. Think of slowly lowering into your squat or bringing your chest to the ground during a push-up. Basically, eccentrics are the downward phase of any lift. For the pull-up, it’s when you’re on your way down from the bar.
Here’s what it means for you—you use negatives to train with an increased load. And an increased load means more strength.
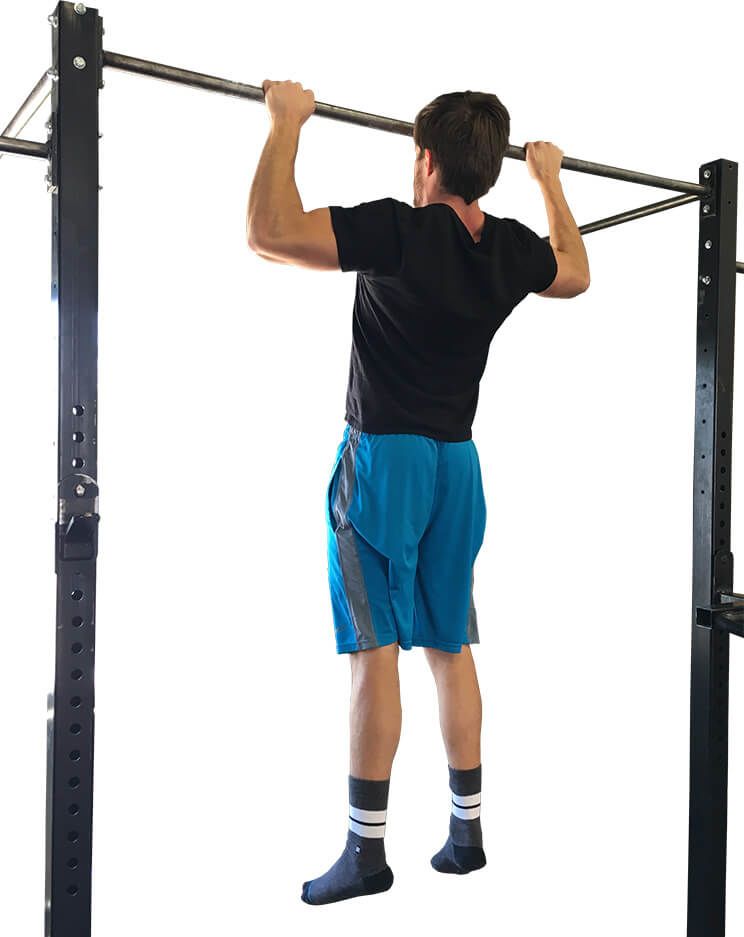
Even if you can’t do a pull-up yet, you can start training with negatives to get there faster. For a negative pull-up, the work starts above the bar. Jump or use a stool to get to the top position of a pull-up, then fight gravity and slowly lower yourself until your arms are fully extended. That’s one rep.
Your strength determines how slowly you move. But remember, this is an eccentric contraction and that means you’re at your strongest.
Pull-ups
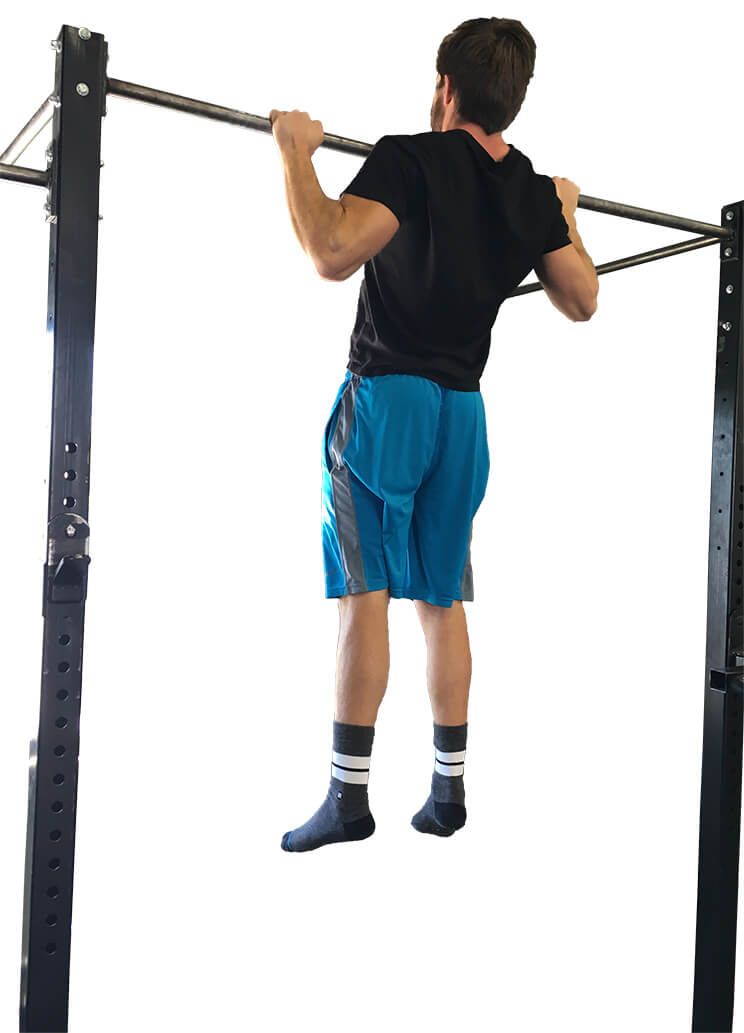
As with any exercise, proper form is critical. To do a pull-up, there are a few things to keep in mind. For one, don’t swing or use your legs to build momentum. When you train pull-ups, train pulling yourself up.
Also, don’t think about an all-out effort to get your chin above the bar. This leads to a cranked neck, poor form, and oftentimes some weird kicking near the top. Instead, think about pulling your elbows to your hips. This will keep your shoulders packed and help you develop true pulling power.
Side Note: Assistance
There are a few different ways to decrease the “weight” on your pull-ups. These are called assisted pull-ups, and I strongly recommend them to anyone working on getting better at pull-ups. They’re a great way to bridge the gap between where you are now and where you want to be—be it crushing your first unassisted pull-up or busting them out for reps.
Use assistance during negatives and pull-ups as needed.
Some gyms have assisted pull-up machines. But I’m partial to using a resistance band. For one, you can take a resistance band anywhere. A massive machine? Not so much. Also, using a resistance band has a bit more carryover to an unassisted pull-up.
Do Your First Pull-up
Now it’s time to put it all together. Add the following to your workouts one to two times per week. Spend two weeks in each phase before moving on to the next one. But make sure you add in a few more seconds, an extra couple reps, or another set compared to the week before.
It’s time to crush your first pull-up.
In six weeks, you’ll build some serious pull-up power. If one cycle through isn’t enough to get above the bar, simply rinse and repeat. Pull-ups are hard. It takes time. But this program is designed to prepare you to feel the amazing thrill of accomplishment that comes with your first pull-up!
(Your Next Workout: Mastering the Perfect Pushup)




 Protein-Packed Jerky Almond Granola Recipe



Show Comments