Using a tennis ball for self-massage is a wonderful (and economic) way to ease pain caused by chronic muscle tension. In this article, you’ll specifically learn nine tennis ball hacks for neck, back, hand and knee pain.
Looking for an easy way to get started working out?
Get our FREE Beginners Workout Guide – 3 Weeks To Tighter Abs, Sculpted Arms, And Toned Legs here!
Muscle knots, on the other hand, are a whole different ball game. Knots are sore spots in your muscles (technically known as “myofascial trigger points”) that cause tension both at the site of pressure as well as elsewhere in the body. This is called referred pain. Left unchecked, these knots can lead to myofascial pain syndrome, a chronic condition where the muscle pain persists or worsens over time (1).
Muscle Knots and Lifestyle Habits
As a Pilates trainer, I work with many clients who experience trigger-point pain, especially in the neck, back, hands and knees. Tension in these areas suggests a correlation between the point of pain and repetitive lifestyle movements (2).
For example:
- Using a computer or texting on a phone places repetitive strain on the hands, wrists and neck.
- Sitting for much of the day contracts the muscles surrounding the low back and knees.
- Leaning forward or slouching over a desk keeps the upper back under tension.
Without a daily movement practice that counterbalances these repetitive patterns, you may start to notice:
- Hand cramps
- Wrist pain or carpal tunnel
- Knots in the neck
- TMJ (jaw pain)
- Tightness in the upper back
- Rounding forward of the shoulders
- Piriformis syndrome or sciatica
- Tension headaches
- Chronic low back pain, exacerbated by sitting
- Knee tension without history of injury
- Cramps in the feet
- Restricted range of motion when participating in normal, everyday motions
Adding 10-15 minutes of tennis ball myofascial release into your daily routine can help to reduce the side effects of our rather sedentary, tech lifestyle.
Benefits of Using the Tennis Ball as a Massage Tool
Perhaps you’ve tried myofascial release using the foam roller. While beneficial for certain parts of the body (especially the front and sides of the thigh and the upper back), the roller is not a very precise tool for targeting individual trigger points, and is not safe to use on vulnerable areas of the body, such as the low back. The tennis ball is small enough to isolate pressure where it’s needed, making it effective for releasing smaller areas such as the hips, low back, hands and feet. It’s also very convenient for reaching parts of the body that you’re otherwise unable to access manually.
A Word to the Wise on Self-Massage
It is important to note that, while generally safe, performing self-massage can have its drawbacks – be very aware that you’re pressing and prodding on important parts of your anatomy!
Using the tennis ball should bring you release without irritating the nervous system. This means that it is not only unnecessary but also unsafe to spend longer than 10 breaths on any one area, and “digging deeper” into the area of pain will not be more effective.
I’ve spoken with many people who think that the tennis ball isn’t hard enough to be effective – it’s the “no-pain-no-gain” mentality.
However, the point of trigger point therapy is to encourage relaxation in the area of contraction, and not to cause further contraction by attacking your muscles with a foreign object. In fact, while a tennis ball is a great starting place for self-massage, it may feel too firm for someone just starting out, someone who would do better with a soft rubber ball.
Personally, I have had a very good experience using the tennis ball for muscle pain relief, and I also combine it with other strategies, such as functional movement training, full body stretching as you would do in yoga, and stress management techniques that directly benefit the nervous system.
9 Tennis Ball Mobility Hacks
Sore Feet
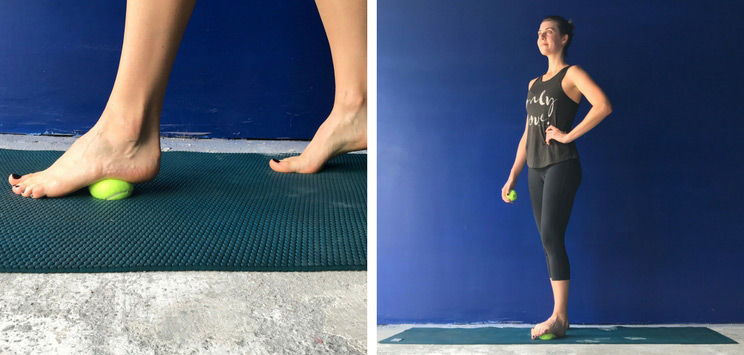
Why it works: The ball relaxes the connective tissue in the soles of the feet, which has a relaxing ripple effect up the entire back side of the body.
How to do it: Place a ball underneath the arch of the foot, standing next to a wall or chair for stability, if needed. Keeping the heel on the floor, inhale and gently press your body weight into the ball, exhale and release the pressure. Repeat for 10 breaths or up to 60 seconds. Proceed to roll the ball along the length of the foot, from toe to heel, massaging the sole of the foot with the ball. Repeat for 10 breaths or up to 60 seconds. Repeat on the other foot.
Tight Calves
Why it works: By gently massaging the tissue along the calf muscle, tension is released from the band of muscle that connects the back of the knee to the heel.
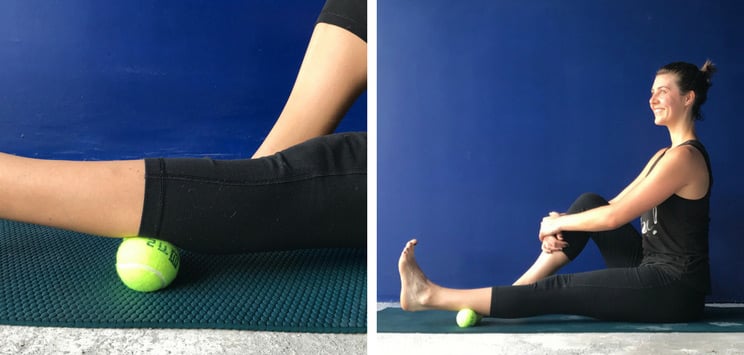
How to do it: Sit on the floor with one leg extended. Place the balls behind the calf, at the midway point. Gently rock the leg from side-to-side across the balls for 5 full breaths. Move the balls two inches higher up towards the knee and repeat. Move the balls so that they are about one inch below the back of the knee and repeat. Then switch legs.
Knee Pain
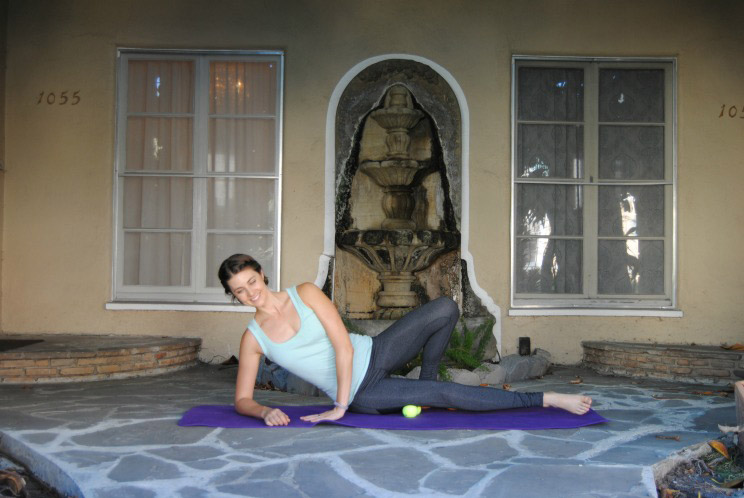
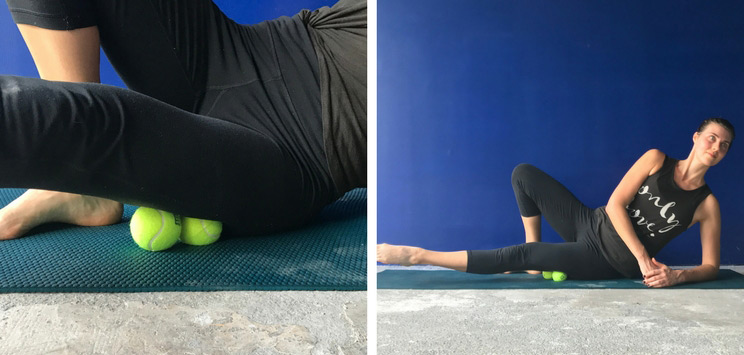
Why it works: The ball “flosses” the often tight connective tissue that runs across the IT band and outer quadriceps. Releasing this pressure will ease knee pain while also relieving the hip.
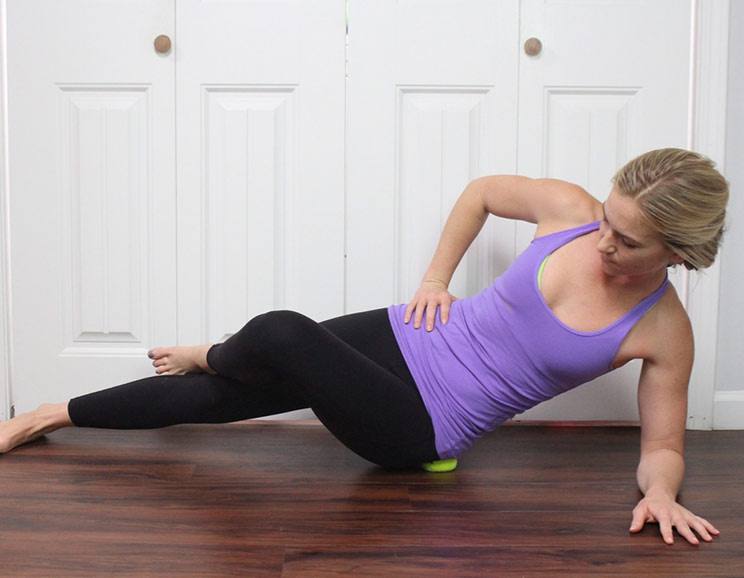
How to do it: Lean onto your right forearm, with the right leg straight and the left leg bent to support your body weight. Place two balls under the outside of the right thigh, between your leg and the ground. Slowly roll your thigh from side-to-side across the balls. Repeat for 15 breaths or up to two minutes. Repeat on the other leg.
Aching Hips
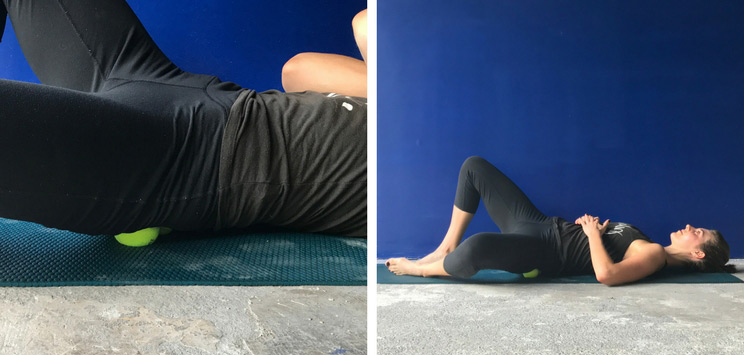
Why it works: Trigger point therapy on the outer hip releases muscle tension in the hip while also benefiting the low back and thighs.
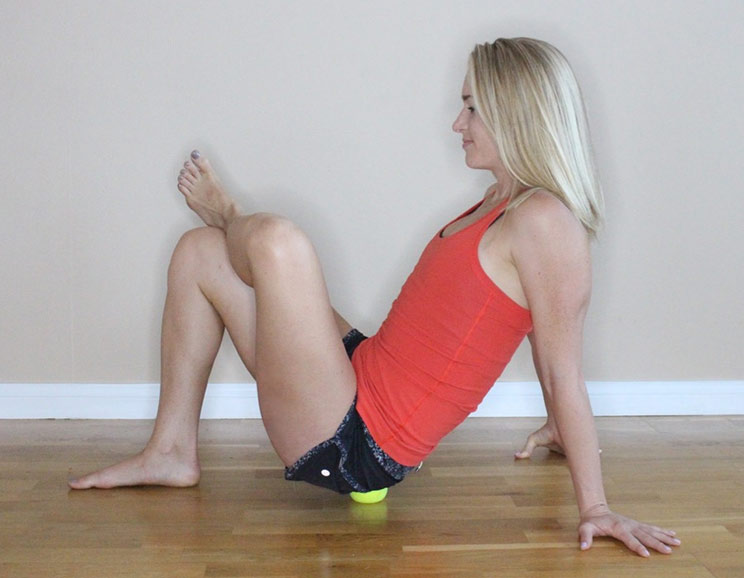
How to do it: Lie on your back, knees bent and feet flat on the floor. Drop your right knee to the side and place the ball under the side of the right hip (gluteus medius). Gently roll your body weight from right to left across the ball, breathing deeply. Repeat for 15 breaths or up to two minutes. Repeat on the other side.
Lower Back Pain
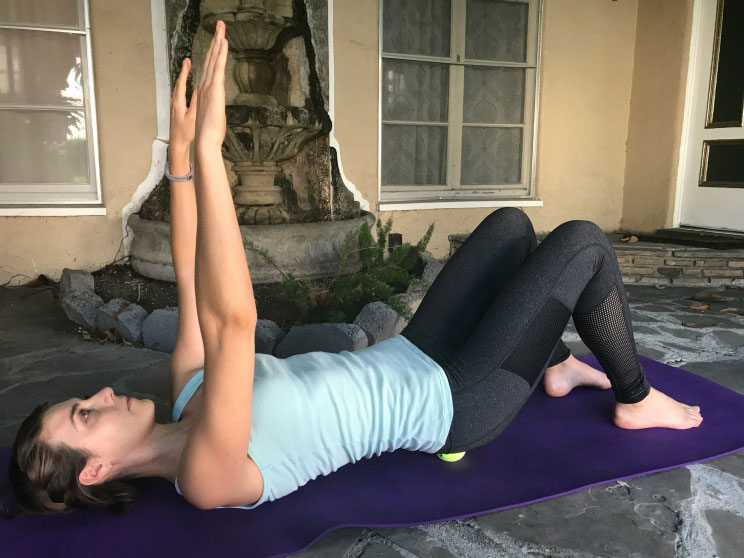
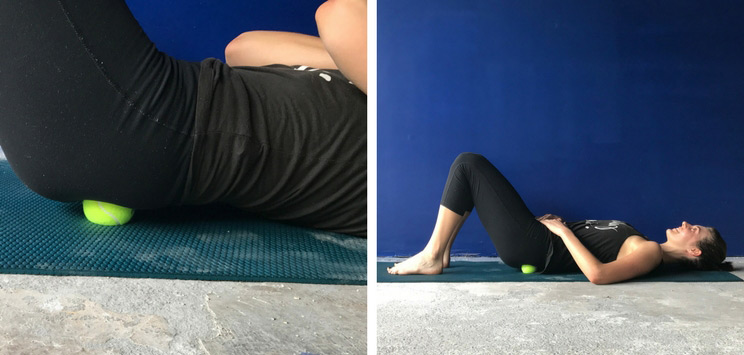
Why it works: This move relaxes the low back by simultaneously releasing pressure in the multifidus muscle and the quadratus lumborum in the low back. By keeping the ball on the fleshy part of the backside, you are able to avoid pressing into delicate bones in the lower back.
How to do it: Lie on your back, knees bent and feet flat on the floor. First find the PSIS (posterior superior iliac spine) by taking your thumbs to the back of the pelvis and finding the two small, bony bumps on either side of your spine. Once you’ve found these points, move your thumbs down one inch and place each ball on the corresponding thumb point, being sure to avoid pressing onto any bones. Once in place, gently release your body weight into the balls, breathing deeply, for 15 breaths or up to two minutes.
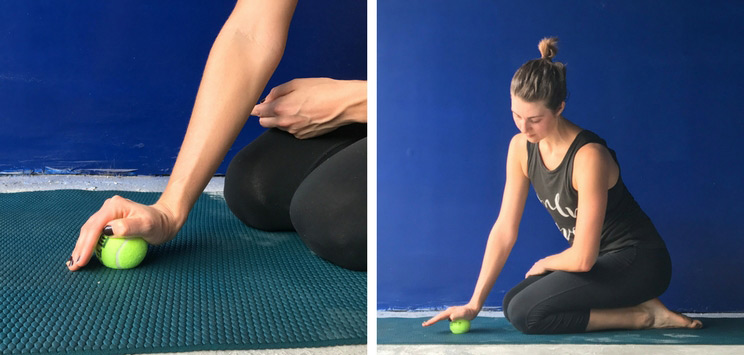
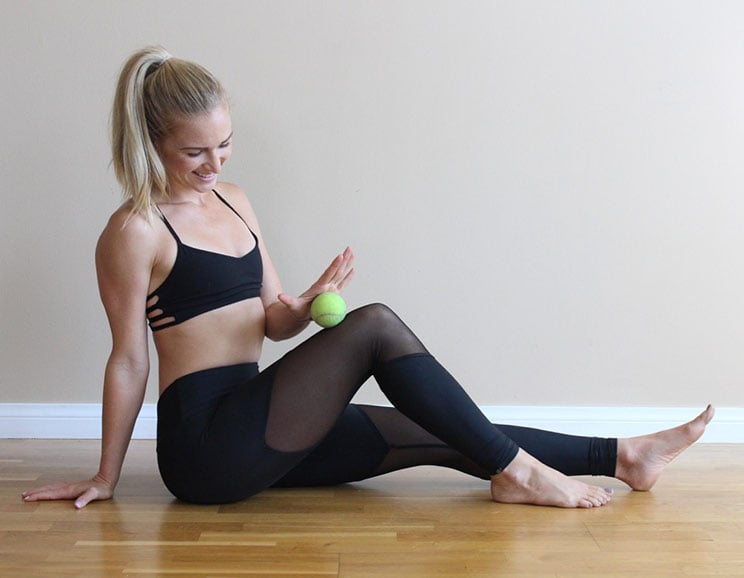
Cramping Hands
Why it works: This move is wonderful for releasing the flexor muscles of the hands, which become tight from computer use, driving and texting on your phone.
How to do it: Sit on the floor and place the heel of your hand on the ball. Gently shift your weight forward to apply pressure into your hand. Breathe deeply for 30 – 60 seconds. Next, roll your hand across the ball, up and down, and side-to-side, for 30 – 60 seconds. Repeat with the other hand.
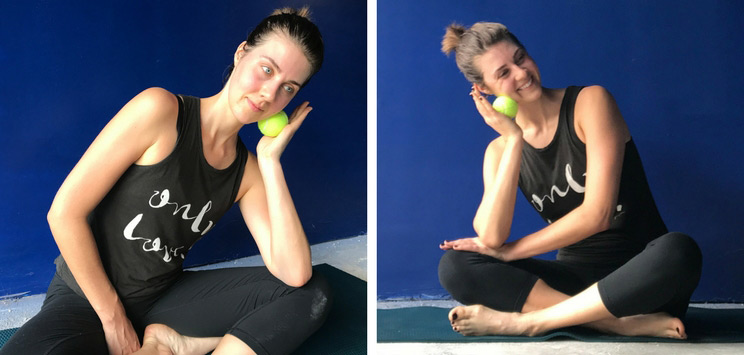
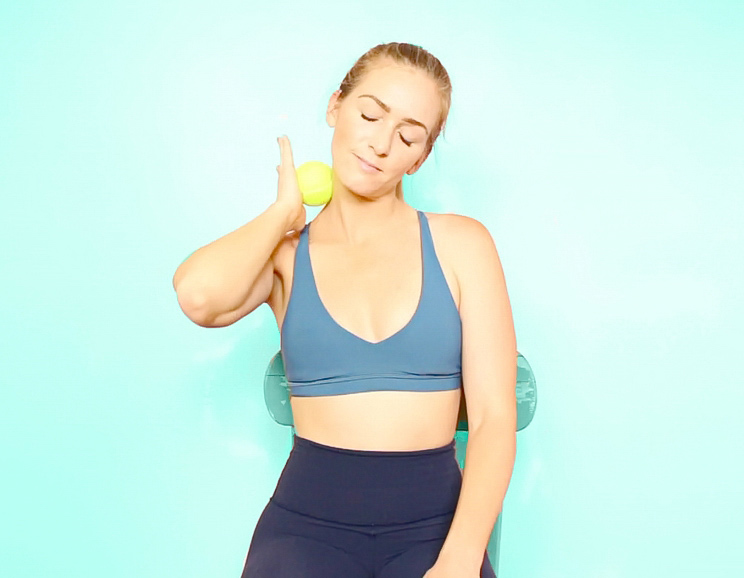
Stiff Jaw
Why it works: Tight neck flexors – caused by staring down at a computer, phone screen, work bench, or while cooking – can pull against the muscles in the jaw, leading to problems such as TMJ, which causes pain, tightness or clicking in the jaw.
How to do it: Sit comfortably, holding the ball in one hand. Gently roll the ball along the jawline from the earlobe to the chin, making gentle circular motions as you travel up and down. Continue for 30 – 60 seconds on one side before switching to the other.
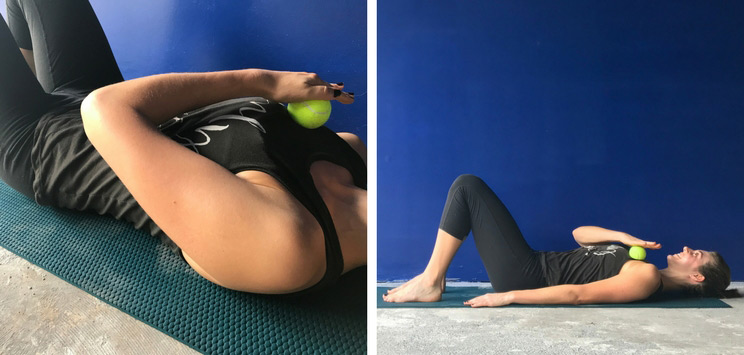
Tight Chest
Why it works: This is a wonderful way to loosen tight chest muscles, which improves breathing and posture.
How to do it: Lie comfortably on your back. Place the ball on the left side of the chest, rolling it around with your right hand. Keeping the pressure very light, roll the ball on the front of the shoulder and over the pec muscles; avoid the sternum and collarbone. Continue for 30 – 60 seconds on one side before switching to the other.
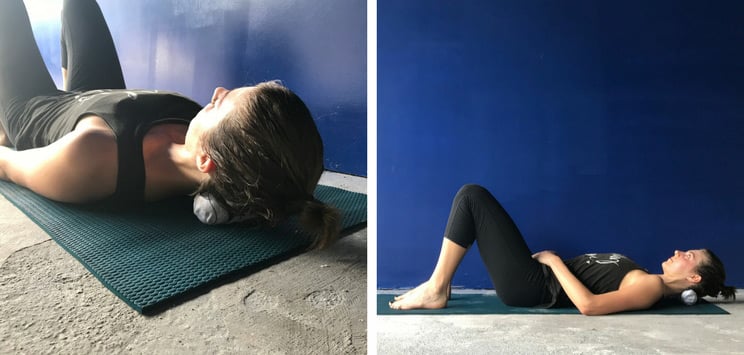
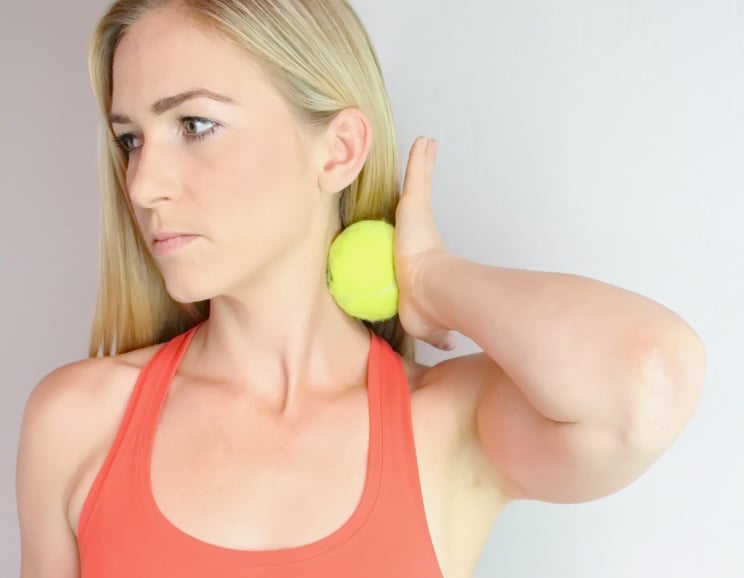
Strained Neck
Why it works: Your neck often gets stiff from being in a static position all day (i.e., staring at a computer screen). This exercise relaxes the muscles at the back of the neck that are responsible for keeping your head upright.
How to do it: Lie comfortably on your back. Place two balls at the base of the skull, one on either side of the spine. Gently allow your neck to relax against the balls, avoiding excessive force. Softly turn the head from right to left, keeping the chin tucked in to the chest.
Tip: If you have problems with the balls moving, place them in a long sock or stocking.
(Your Next Workout: 7 DIY Neck Massages and Stretches)





 The Easy Guide to Natural Skincare

Show Comments