Polycystic Ovarian Syndrome (PCOS) is a hormonal condition that affects up to 10 million women in the world (1). If you’re one of the many diagnosed with this condition, these yoga poses for PCOS can help decrease your stress hormones.
It is believed that both environmental factors and genetics can contribute to this condition that can cause physical and mental symptoms, including cysts on the ovaries and infertility.
Other signs and symptoms of PCOS include excess testosterone, mood instability, hair growth in unwanted places, acne, excess insulin, weight gain, and irregular menstrual cycles.
PCOS has to be medically diagnosed and once it is, there are many options for treatment. Unfortunately, these typically act to treat the symptoms but don’t solve the root cause of the problem. They can also come with the risk of side effects. Luckily, there are many natural alternatives to treating PCOS including diet, exercise, acupuncture, and yoga (2).
Are you struggling to lose weight, craving foods you shouldn’t, and finding yourself fatigued and unable to focus? Chances are, your Hormones are out of whack.
Get our FREE Guide to fixing your Hormones through the Paleo diet here!
Yoga has shown to be even more beneficial for PCOS than a normal exercise program (3) for a variety of reasons.
- Pranayama (breathwork) and the meditation techniques of yoga, help to calm the mind and reach a state of deep relaxation (4). This leads to a decrease of stress hormones like cortisol and a regulation of hormonal imbalance.
- Yoga calms and relieves tension in the body, which in turn calms the mind. This again leads to a regulation of hormonal imbalance.
- The regulation of hormones plus the physical activity of yoga, helps to decrease weight gain.
- Yoga can help to balance out glucose metabolism and blood lipid levels (5).
- The weight bearing poses of yoga help to increase muscle mass. This increase of muscle mass helps to combat the insulin resistance that often comes along with PCOS. Also, an increase in muscle mass leads to a higher calorie burn at rest, aiding in weight loss.
- Certain types of yoga get the heart rate up, increasing calorie burn and aiding in weight loss.
If you have PCOS, the best types of yoga to start out with are yin, restorative, or slow vinyasa. These slower variations of yoga have a profound effect on stress levels due to a slow pace that allows room for complete relaxation. Incorporating pranayama and meditation techniques will also add to the benefits of your asana (physical) practice.
11 Yoga Poses For PCOS
For maximum benefits, do these poses in order as a routine 3 to 5 times a week.
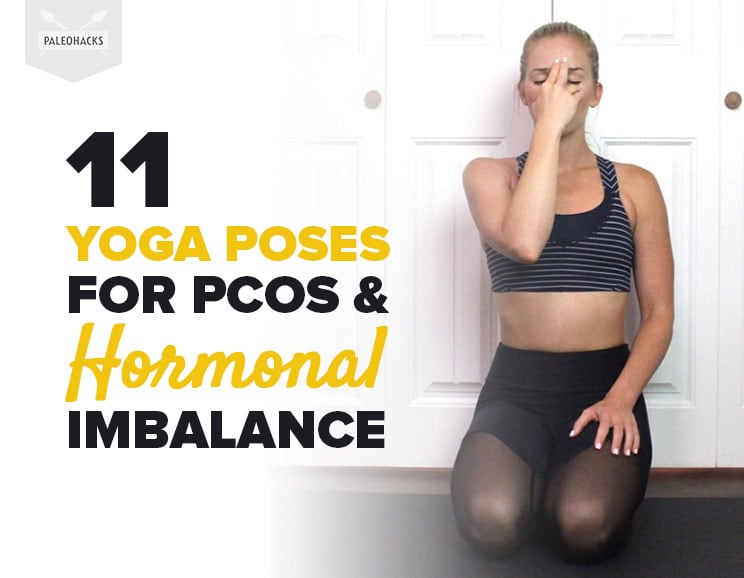
Alternate Nostril Breathing (Nadi Shodhana)
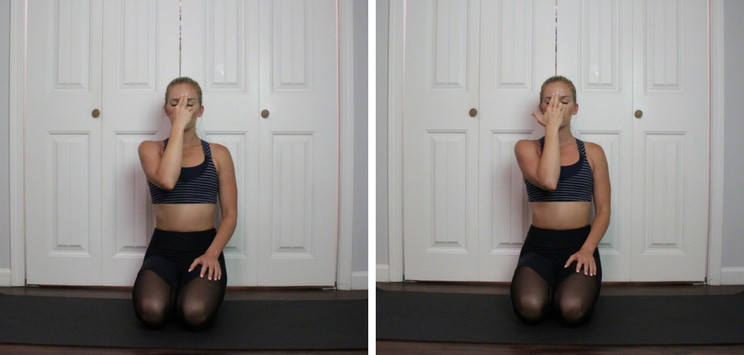
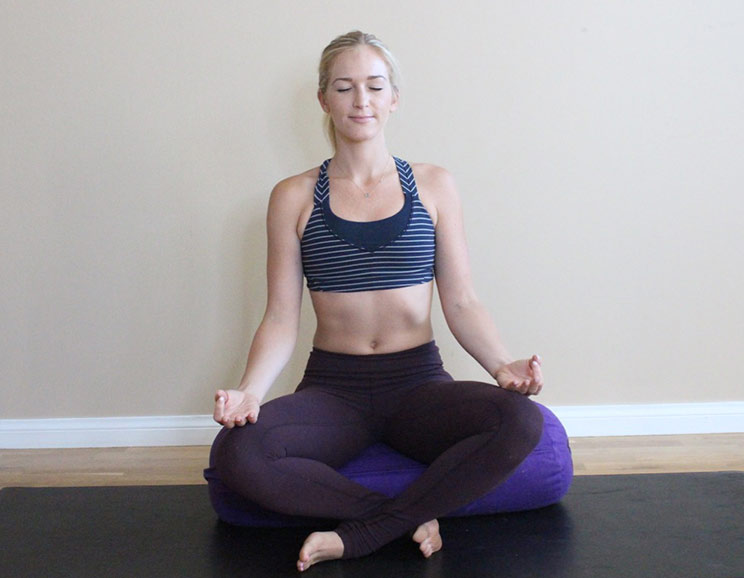
This pranayama technique is extremely beneficial for calming the mind, increasing parasympathetic (rest and digest) activity (6), and balancing the energy channels.
- Begin in a comfortable seat. You can kneel down with your hips back on your heels or sit in a cross-legged position. Place your left hand down to rest on your left thigh. Bend your right elbow and place your index finger and middle finger between your brows. Place your thumb over your right nostril and your ring finger over your left nostril.
- Plug your right nostril with your thumb and take a slow inhale through your left nostril. Pause at the top of your inhale. Then, plug your left nostril and take a slow exhale through your right nostril. Pause at the end of your exhale.
- Inhale through your right nostril. Pause at the top of your inhale. Then, plug your right nostril and exhale through your left nostril. Pause at the end of your exhale. Inhale through your left nostril, then exhale through your right. Close your eyes and continue this breathing for 3 minutes.
For the remainder of the routine, you will cultivate an Ujjayi breath to continue to help slow the Parasympathetic Nervous System.
To practice Ujjayi breathing: Seal your lips closed and place the tip of your tongue on the roof of your mouth. When you do this, you should feel a slight constriction in the back of your throat. Begin to breathe slowly in and out of the nose. Your breathing should feel textured and your exhales should be audible.
Child’s Pose
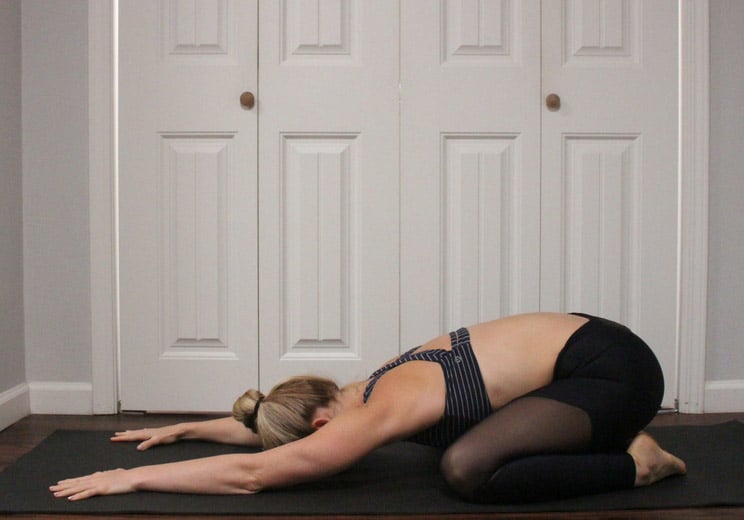
Child’s Pose helps to calms the central nervous system, and relieve lower back tension and menstrual cramps.
- Begin in a tabletop position on your hands and knees.
- Take your knees out wide towards the edges of your yoga mat. Bring your big toes together to touch.
- Slowly walk your hands back and lower your hips onto your heels. Then, walk your hands towards the top of your mat and lower your chest and forehead down. Hold for 8 slow Ujjayi breaths.
Cat Cow
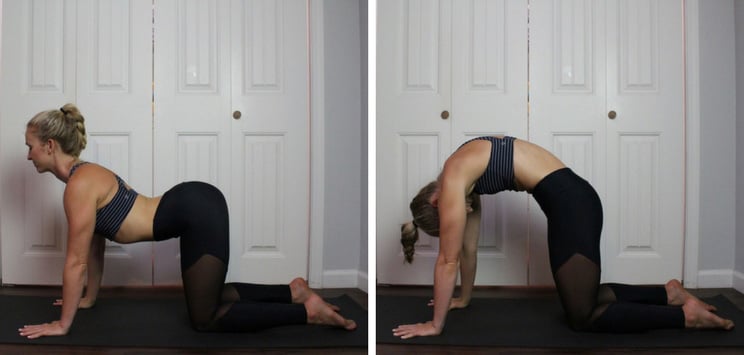
Cat Cow helps to stimulate the central nervous system and loosen the muscles around the spine. The pose also helps to massage and stimulate the abdomen and reproductive organs.
- Begin in a tabletop position on your hands and knees with a neutral spine. Draw your navel up and in to engage your abs.
- Take an inhale and lower your belly towards the floor for Cow Pose. Hug your shoulders down your back and tilt your tailbone up. Keep your gaze down over your nose and maintain a long neck.
- Then, exhale to round your spine for Cat Pose. Draw your belly up and gaze towards your navel. Continue alternating between Cow and Cat for 8 rounds of breath.
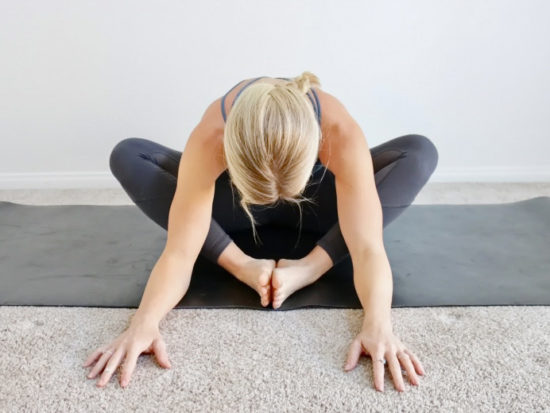
Baddha Konasana
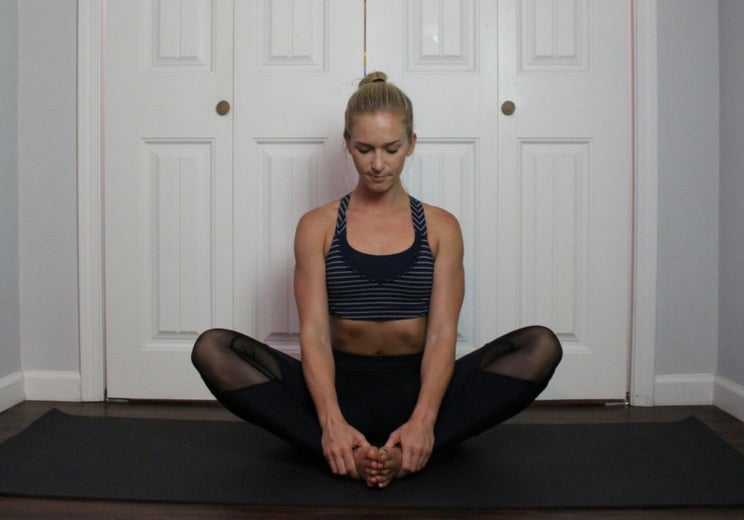
Baddha Konasana helps to relieve tension in the lower back and open up the pelvic region. It also helps to reduce tension and relieve menstrual pain.
- Begin in a seat on the floor. Bend your knees and place your feet flat on the floor.
- Walk your feet together to touch. Then, let your knees fall out to the sides.
- Sit up tall and place your thumbs on the arches of your feet. You should feel the hips release. If you want to feel more sensation, you can press your thighs open further with your elbows. Hold for 8 breaths.
Seated Figure 4
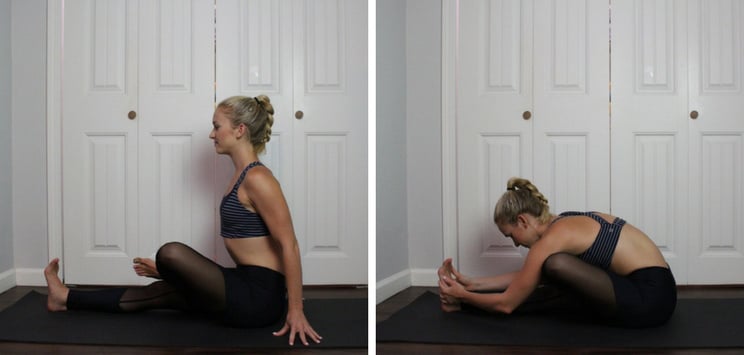
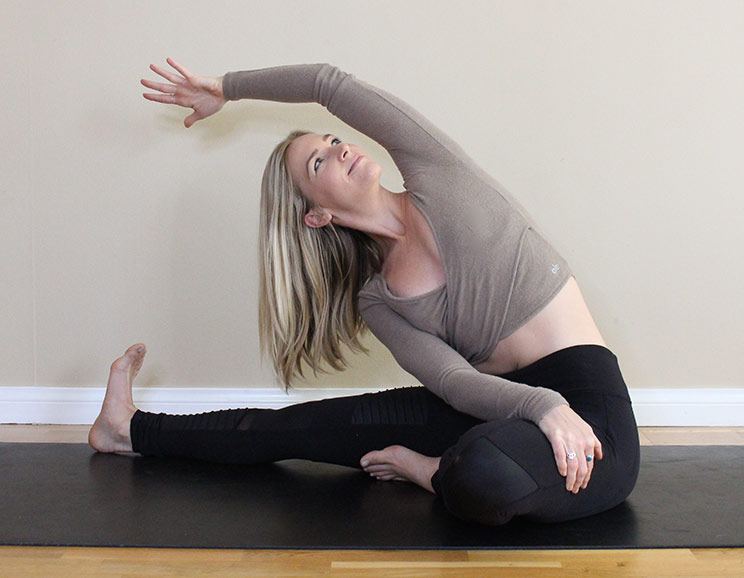
Seated Figure 4 alleviates tension in the hips and lower back. It also helps to promote alignment of the reproductive organs, strengthen the ovaries, and alleviate menstrual problems.
- Start seated on the floor. Straighten your right leg out in front of you. Bend your left knee and place your left foot on top of your right thigh directly above your knee.
- Sit up tall and breathe into your left hip. Then, with a long spine, slowly walk your hands forward to fold your torso over your left foot and your right thigh.
- Hold for 8 breaths. Then, slowly rise up and switch sides.
Bharadvaja’s Twist
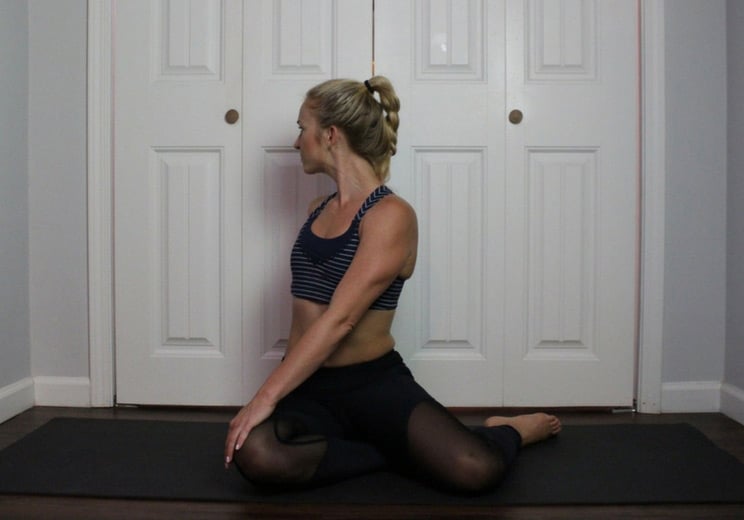
Seated Figure 4 massages the digestive and reproductive organs. This pose also helps to loosen the muscles around the spine, lower blood pressure, and soothe the nervous system.
- To begin, sit on the floor with your knees bent and your feet on the floor. Place your hands behind you and sit up tall.
- Slowly let your knees fall to the left so that the right thigh is on top of the left foot.
- Place your right hand on the floor behind you and take an inhale to reach your left hand up. Exhale, to twist to the right, placing your left hand outside of your right thigh. Hold for 8 breaths, then switch sides.
Tip: While holding this twist, use your breath to go deeper. With your inhales, sit up taller to lengthen your spine. With your exhales, twist a bit deeper.
Cobra Pose
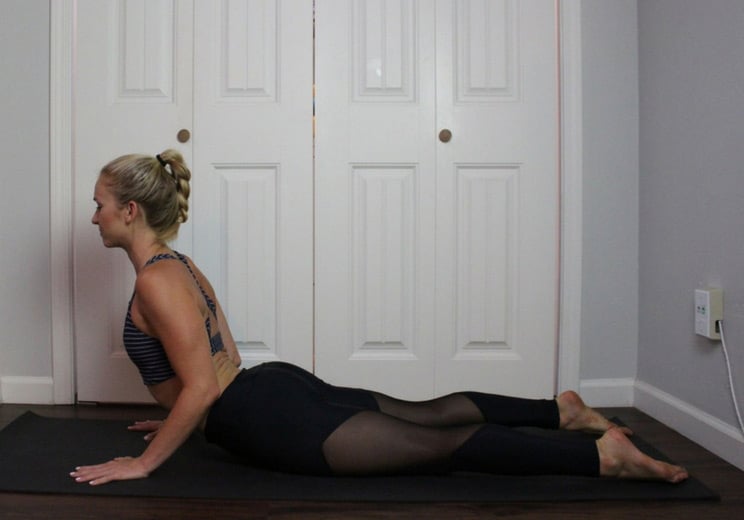
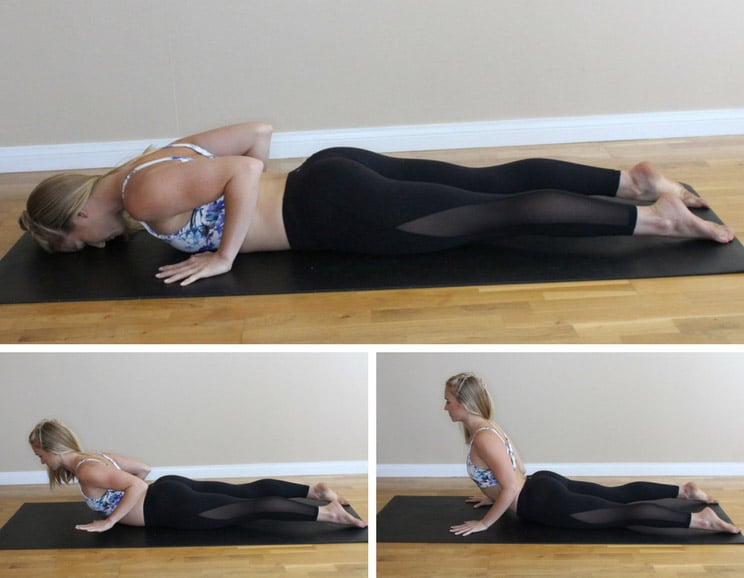
This pose applies gentle pressure to the stomach and helps stimulate the functions of the ovary.
- Begin lying on the floor face down. Take your forehead to your mat and have your legs going long down the mat behind you.
- Place your hands on the mat in line with your ribs. Engage your abs.
- Inhale to press through your palms and slowly peel your head and chest off the mat. If your lower back is tight you may only come up a few inches. If your lower back is more open, press up until you have just a slight bend in the elbow. Make sure you can keep your shoulder down your back and away from your ears. Keep your abs engaged to protect your spine. Hold for 5 breaths and then slowly release.
Prasarita
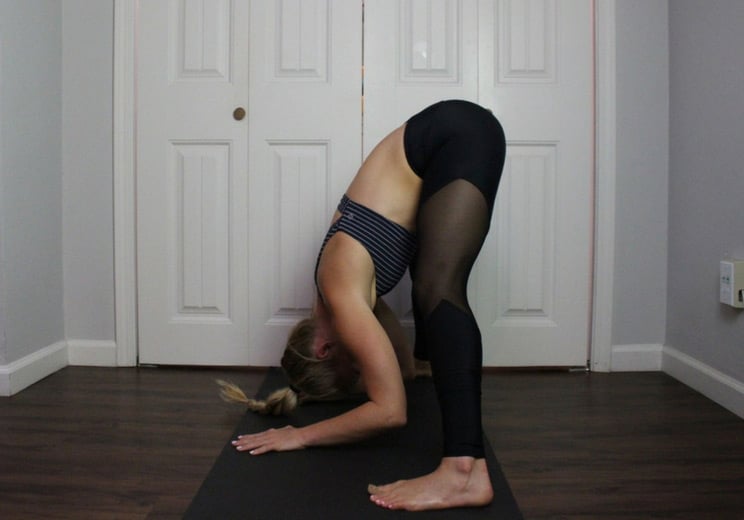
Prasarita increases blood circulation to the ovaries while relieving tension in the hips and lower back.
- Start standing with your feet out wide. Point both feet forward so that they are parallel to one another.
- Bring a small bend into your knees and slowly fold forward with a flat back.
- Place your hands on the mat. Let your head and shoulders hang heavy and shift your weight towards the balls of your feet. Feel your spine lengthen. Hold for 8 breaths.
Tip: Keep your knees bent generously if you have lower back tightness.
Malasana
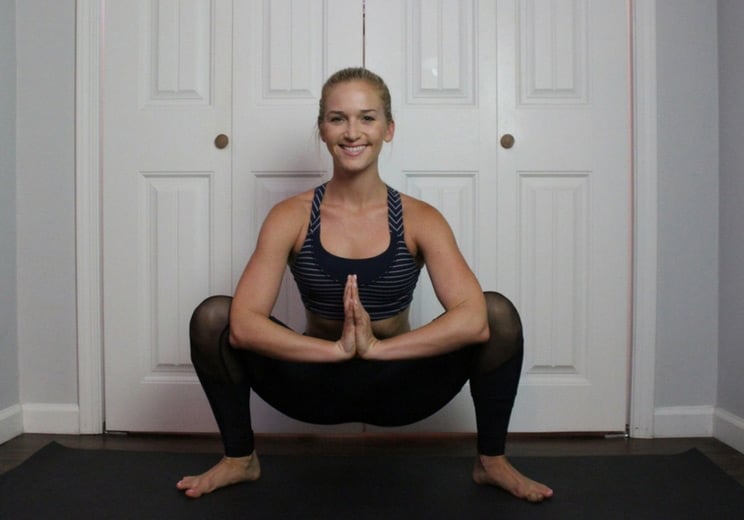
Malasana strengthens the core and the pelvic floor. It also helps to relieve tension in the hips.
- Begin standing with your feet out a little wider than hips-width distance. Turn your toes to point out at 45 degree angles and place your palms together in front of your chest.
- On an exhale, bend your knees to slowly lower your hips towards the ground.
- Once your hips are a few inches above the ground, use your upper arms to press your thighs open. Simultaneously, squeeze the thighs inwards so that you feel a lift through the hips. Lift your chest into the backs of your thumbs and squeeze your shoulders down your back. Hold for 8 breaths.
Bridge Pose
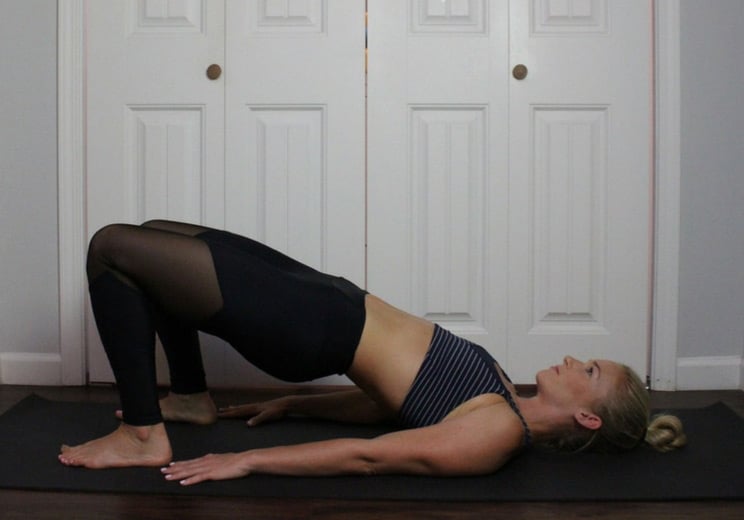
Bridge Pose strengthens the core and pelvic muscles, stimulating your immune and endocrine systems.
- Begin by lying on your back with your knees bent and your feet on the ground. Place your arms down alongside your body with your palms face down. Keep your feet hip-width distance and walk them close to your body.
- Press your palms into the ground as you exhale and lift your hips up towards the ceiling.
- Stay active through the inner thighs and squeeze your glutes and abs. Hold for 8 Ujjayi breaths, then slowly roll back down to your back one vertebrae at a time.
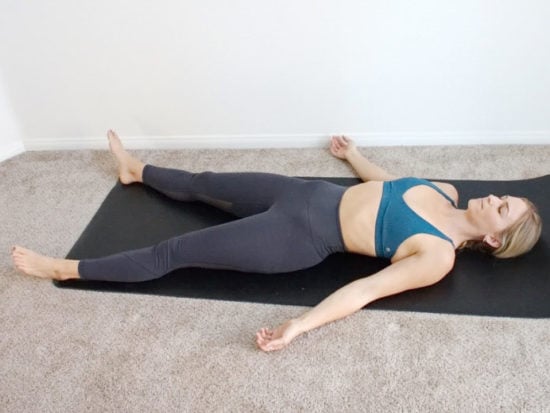
Corpse Pose
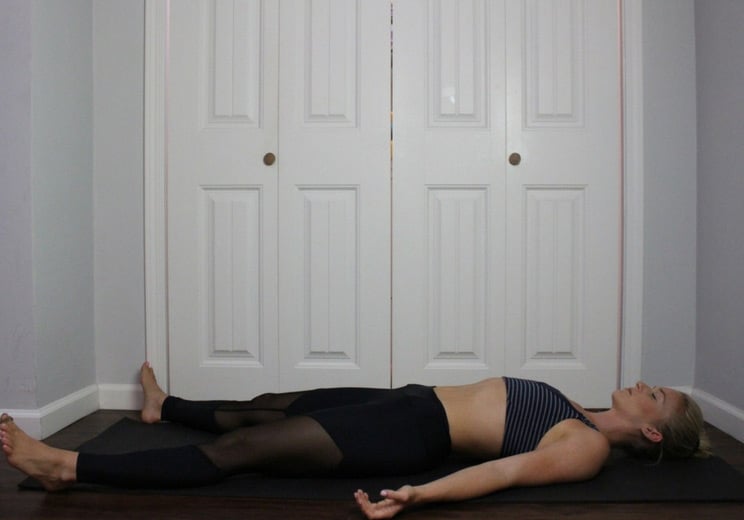
Corpse Pose is the ultimate relaxation pose. It allows you to completely relax, balancing out stress hormones.
- Begin lying down on the floor.
- Straighten your legs long down the mat and bring your feet out wide. Let your toes fall outward.
- Bring your arms down alongside your body with your palms face up. Close your eyes and take a few deep breaths. Then, find a natural breath and allow your mind and body to relax. Hold this pose for 3-5 minutes.

(Your Next Workout: Do These 3 Stretches to Release Neck and Shoulder Pain (At Your Desk))


 Scalloped Sweet Potatoes Drizzled with Buttery Maple Ghee
Show Comments